Friday, 12 December 2008

Sumpthings wrong


Now whilst the engine was in the kit I noticed the sump was very low. (the front chassis rail was on blocks to gain height to get the engine hoist under the car)


One quick call to Scholar engines and I now have a lowline sump.


Test fit the engine


After bolting the gearbox to the engine I test fitted it to find out where to drill the holes for the engine mounts.


There is a part of the bell housing that needs to be cut off to clear the passenger side footwell.


The near side engine mount needs to be spaced of the engine due to a bit that sticks out.


With the engine in place I marked the holes that needed to be drilled.

The next move was to remove the engine, drill and bolt the mounts in place.


Helpfull tip: If you can't get your hand between the mount plate and the stainless panel, take your spanner and place a bit of masking tape on one side of it at the ring end, place the nut in the ring and then place the washer on top of the nut, then fold over the masking tape to just stick on the edge of the washer. Now the nut and washer won't slip or fall off.

Sunday, 30 November 2008

Rolling chassis


With all the those jobs done I can fit the wheels and get it off the stands.......
New problem....
How many times can I trip over it??
Note. The board on the front of it is my work table.

Dash and Scuttle


Between a few of the previous jobs I had a go at sorting out the dash, scuttle and front Firewall.
With it put together all I need to do now is fit it to the chassis.

We need brakes..


Next fit the rear brakes and new drums, Don't forget to shorten the handbrake cable.

Diff and shafts


After fitting the diff and driveshafts it now looks like this.
Next time the rear brakes.

Driveshafts are driving me crazy!


Now the fun part!


My driveshafts had nackerd gaiters so I changed them.


Prob 1. What sierra did they come from?

Prob 2. How to take them apart?

Prob 3. Split gaiters (glue style) or std ones.


Well I could'nt get the split ones so had to go to ford and get the right ones from them.


For a small fee £9.68 each I now have replaced the old gaiters.


If anyone needs help to do these gaiters email me on mac801123@lycos.co.uk and I'll send you a file on how to do it.

Gearing up !!


At last I have my gearbox and diff back!
So next job was to fit the diff and prop.

Monday, 3 November 2008

Down under...


At this point I turned It over and riveted the underside.. and received a hernia for the trouble...

Go kart...


Now we have a kit that now resembles a go kart.

And If I might add I'm quite pleased with myself..

Front Suspension

Fit the front wishbones and components.
The top wishbones are tight but they do fit If fitted at the rear first and then pulled forwawd Into the front mount.
Once It's all together It should look something like this...
Remember to leave the bolts loose till It's on the ground. I have test fitted the steering rack to see how well It fits.


Rear Suspension


Fit the rear wishbones, Shock and back plate with the spacers provided.
As I am still waiting for the diff and gearbox to get back to me I have tried to do other jobs to keep myself busy, that's why there is no diff or drive shafts fitted.
Remember to drill a hole In the hub carrier for the bottom shoe retaining pin.

Make a wish! or 8


Now for the worst job I have done on this kit....
Fit the bushes and sleeves into the wishbones without damaging yourself or your equipment.
I broke my vice twice and now It's going to the bin (age 6 weeks).
Sorry for not having the pics of the bushes going In but my camera was missing the day I built them..

Outer panels

Now that I have the Footwell, tunnel and rear panels fitted the next job was to fit the outer side panels.

Note: Look after the drill bits, make sure you have plenty and most of all If they snap try not to hit the panels (as I did twice) BUGGER!!


Friday, 17 October 2008

Starting to fit the panels


Next It's time to fit the panels......

Test fit the panels and see if they need trimming or adjusting.

Mark out and drill the rear panel, tunnel panels and footwell panels.

Fit to chassis, drill and rivet.

Starting to fit parts

Nows the time to throw away those bloody paint brushes and start to do the proper stuff.
So fit the brake master cylinder and brake pipe from front to rear making sure you attach it at the proper distances.


Fit the handbrake and handbrake cable.


Fit rear brake pipes, 'T' peice and rear brake flexi hoses.


Steering column and steering bush.
Sunday, 12 October 2008

Grind and paint chassis

Grind the welds that need to be done then paint with rust converter, primer and then top coat.


Clean and paint donor parts

Wire brush the old rust off the parts.


Paint with rust converter (left side)
Then paint with Gray primer (right side)


Then paint with top coat (I used international 10 year garage door enamel)

Donor parts


First job Is to sort out the donor parts so strip, wire brush and examin.


With that done send away the diff and gearbox.

Thursday, 9 October 2008

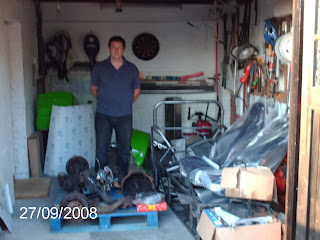
27/09/2008 Collection day


After a 4 hour drive, 3 hours at Great British Sportscars and another 4 hours to get back home I am the proud owner of a Zero Superspec in Kawasaki Green with stainless steel panels.


Oh what have I done, I now have a garage full of bits and pieces nuts and bolts. All I have to do now Is make a cup of tea (or several) and start building. I mean it's just a big meccano set right? Well over the next few weeks we'll find out.